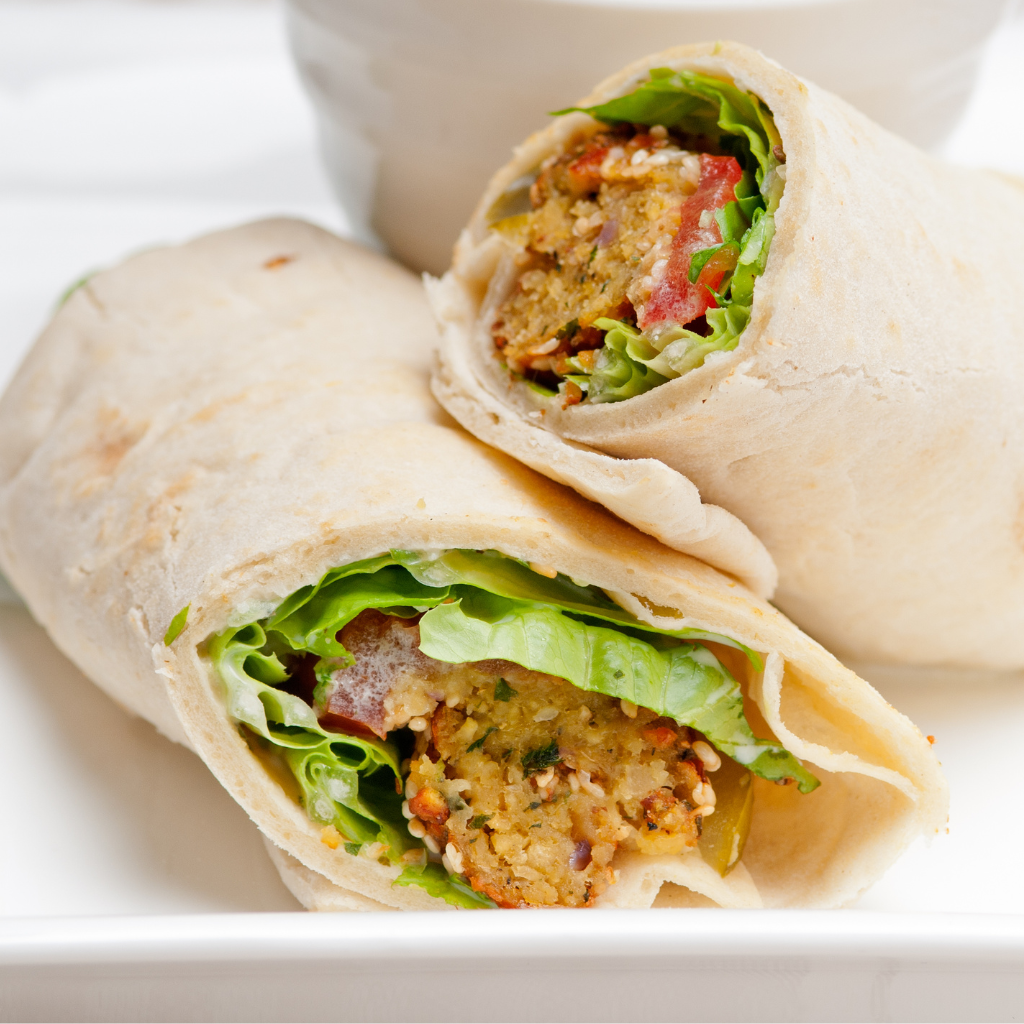
With a few simple ingredients and some creativity, you can prepare delicious and healthy meals in minutes.
They ensure your child enjoys a balanced diet without the hassle. Plus, these meals can be prepared the night before, saving precious time in the morning rush. Say goodbye to stressful mornings and hello to effortless, nutritious lunches.
The Importance Of Nutritious School Lunches
A well-balanced lunch is crucial for your child’s growth and development. Nutritious school lunches provide the energy and nutrients needed for a productive school day. Here are some benefits of packing a healthy lunch:
- Improved concentration: Healthy foods like fruits, vegetables, and lean proteins help kids stay focused in class.
- Better behavior: A balanced diet can lead to fewer mood swings and more stable behavior.
- Enhanced learning: Nutrient-rich foods support brain function and memory.
Ensure your child’s lunch includes:
| Food Group | Examples |
|---|---|
| Fruits | Apples, bananas, berries |
| Vegetables | Carrot sticks, cucumber slices, cherry tomatoes |
| Proteins | Chicken, turkey, tofu |
| Whole Grains | Whole wheat bread, brown rice, quinoa |
| Dairy | Cheese, yogurt, milk |
Tips For Packing School Lunches In Minutes
Time is of the essence, especially on busy school mornings. Here are some tips to help you pack lunches quickly:
- Prep the night before: Prepare ingredients like washing fruits and cutting vegetables the night before.
- Use leftovers: Repurpose dinner leftovers for lunch the next day. It saves time and reduces waste.
- Keep it simple: Stick to easy-to-assemble items like sandwiches, wraps, and salads.
- Organize your kitchen: Keep lunch-making supplies like containers, utensils, and snacks in one accessible spot.
- Make a menu: Plan a weekly lunch menu to avoid last-minute decisions.
Recipe 1: Veggie And Hummus Wrap
First on the list is the Veggie and Hummus Wrap. This wrap is not only quick to make but also packed with healthy nutrients. Perfect for kids who need energy to get through their school day!
Ingredients Needed For Veggie And Hummus Wrap
To make this delicious Veggie and Hummus Wrap, you will need the following ingredients. Make sure to gather everything before you start:
- Whole wheat tortilla – 1 large piece
- Hummus – 2 tablespoons
- Cucumber – 1/2, thinly sliced
- Carrot – 1, shredded
- Red bell pepper – 1/2, thinly sliced
- Spinach leaves – 1/2 cup
- Avocado – 1/2, sliced
- Salt and pepper – to taste
Each ingredient adds a unique flavor and texture to the wrap. The whole wheat tortilla provides a sturdy base, while the hummus adds creaminess. Fresh veggies offer crunch and a burst of freshness. This combination ensures a balanced and tasty meal for your child.
Step-by-step Preparation Guide
Follow these simple steps to prepare the Veggie and Hummus Wrap:
- Lay the tortilla flat on a clean surface.
- Spread the hummus evenly over the tortilla using a spoon or spatula.
- Layer the veggies starting with the spinach leaves, followed by cucumber, carrot, red bell pepper, and avocado slices.
- Season with salt and pepper to your child’s taste.
- Roll the tortilla tightly from one end to the other, ensuring the fillings stay in place.
- Cut the wrap in half diagonally to make it easier for small hands to hold and eat.
Each step is designed to be quick and easy, ensuring you can prepare this wrap in minutes. The key is to keep the fillings balanced so that every bite is flavorful and nutritious.


Tips For Customizing The Wrap
Personalize the Veggie and Hummus Wrap to suit your child’s preferences:
- Add different veggies like cherry tomatoes, shredded lettuce, or sliced mushrooms.
- Incorporate protein by adding grilled chicken strips, turkey slices, or boiled egg slices.
- Change the spread by using guacamole, tzatziki, or a different flavored hummus.
- Include cheese like shredded cheddar, mozzarella, or feta for extra flavor.
- Use different tortillas such as spinach, tomato basil, or gluten-free options.
Experiment with these tips to keep the wrap exciting and varied. This way, your child will look forward to lunchtime every day. The Veggie and Hummus Wrap can be a staple in their lunchbox, with endless customization options.
Recipe 2: Chicken And Cheese Quesadilla
Today, let’s dive into Chicken and Cheese Quesadilla. This delicious, cheesy, and protein-packed lunch option will make your kids smile and keep them energized throughout the day.
Ingredients Needed For Chicken And Cheese Quesadilla
To make a mouth-watering Chicken and Cheese Quesadilla, you’ll need the following ingredients:
- 2 Flour Tortillas – These form the base of your quesadilla.
- 1 cup Shredded Chicken – Use leftover chicken or rotisserie chicken for convenience.
- 1 cup Shredded Cheese – Cheddar or Monterey Jack work well.
- 1/4 cup Salsa – Adds a flavorful kick.
- 1 tbsp Olive Oil or Butter – For cooking the quesadilla to perfection.
Here’s a quick table to summarize the ingredients:
| Ingredient | Quantity |
|---|---|
| Flour Tortillas | 2 |
| Shredded Chicken | 1 cup |
| Shredded Cheese | 1 cup |
| Salsa | 1/4 cup |
| Olive Oil or Butter | 1 tbsp |
Step-by-step Preparation Guide
Follow these simple steps to prepare the Chicken and Cheese Quesadilla:
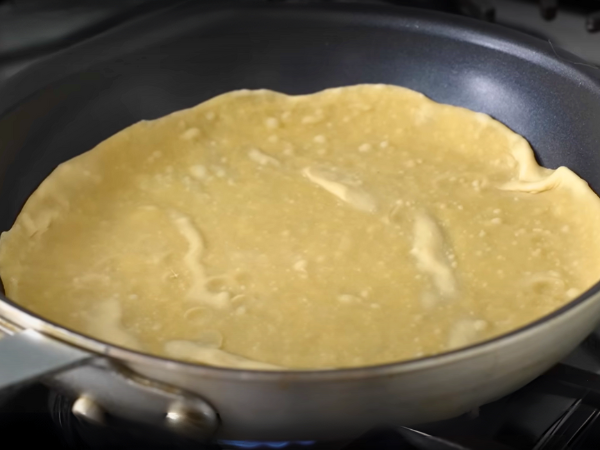
- Heat a Pan: Warm a non-stick pan over medium heat and add olive oil or butter.
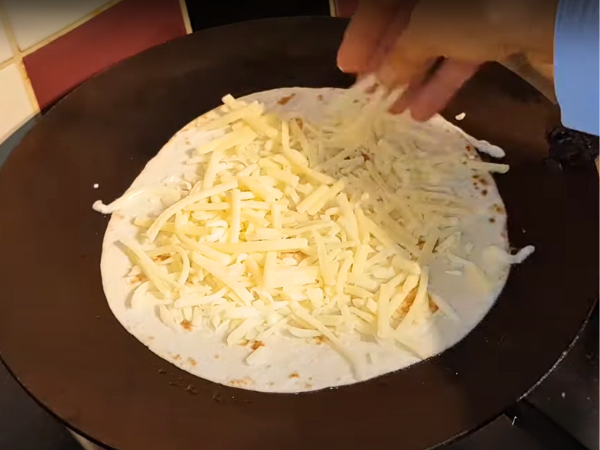
- Assemble the Quesadilla: Place one tortilla in the pan. Sprinkle half of the shredded cheese evenly on the tortilla.
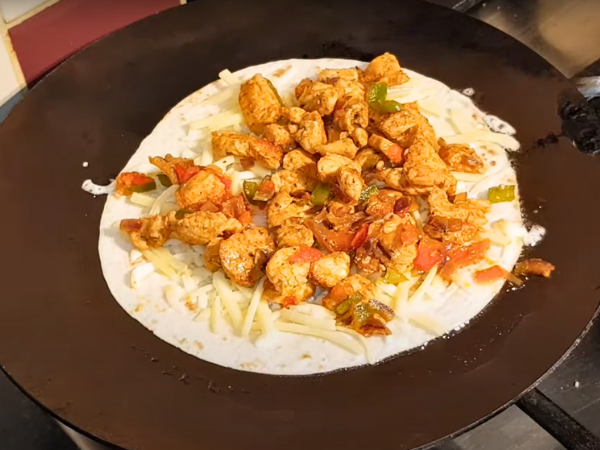
- Add Chicken and Salsa: Spread the shredded chicken and salsa over the cheese layer.
- Top with More Cheese: Sprinkle the remaining cheese on top of the chicken and salsa.
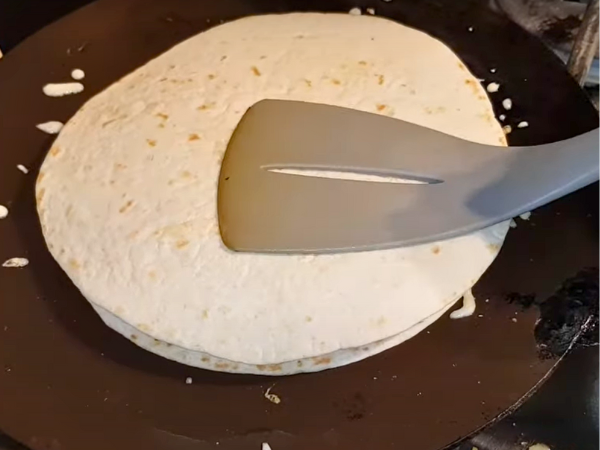
- Cover with Second Tortilla: Place the second tortilla on top and press down gently.
- Cook Until Golden: Cook for about 3-4 minutes until the bottom tortilla is golden brown.
- Flip Carefully: Using a spatula, flip the quesadilla and cook the other side for another 3-4 minutes.
- Slice and Serve: Remove from the pan, slice into wedges, and let it cool before packing.
Make-ahead Tips For Busy Mornings
Busy mornings can be stressful, but these tips will help you prepare Chicken and Cheese Quesadilla in advance:
- Pre-Cook Chicken: Cook and shred the chicken ahead of time. Store in the fridge for up to three days.
- Grate Cheese in Bulk: Shred cheese in bulk and store it in an airtight container in the fridge.
- Assemble the Night Before: You can assemble the quesadilla the night before. Wrap it in plastic wrap and store it in the fridge.
- Quick Morning Cook: In the morning, just cook the pre-assembled quesadilla in a pan for a quick and hot lunch.
- Freezing Option: You can also freeze the assembled quesadilla. Thaw it overnight in the fridge before cooking it in the morning.
With these make-ahead tips, you’ll have a nutritious and tasty school lunch ready in no time, making your mornings a breeze.
Recipe 3: Turkey And Avocado Sandwich
One of the favorites among kids is the Turkey and Avocado Sandwich. This sandwich is not only delicious but also packed with nutrients, making it a perfect option for your child’s lunchbox.
Ingredients Needed For Turkey And Avocado Sandwich
To make the Turkey and Avocado Sandwich, you need a few simple ingredients that are probably already in your kitchen. Here is what you’ll need:
- Whole grain bread – 2 slices
- Sliced turkey breast – 4-5 slices
- Ripe avocado – 1 half, mashed
- Lettuce leaves – 2-3 pieces
- Tomato – 1, sliced
- Mayonnaise – 1 tablespoon
- Salt and pepper – to taste
These ingredients ensure that your child gets a balanced meal. The whole grain bread provides fiber, while the turkey offers protein. The avocado is packed with healthy fats, and the veggies contribute vitamins and minerals.
Step-by-step Preparation Guide
Making the Turkey and Avocado Sandwich is quick and easy. Follow these steps:
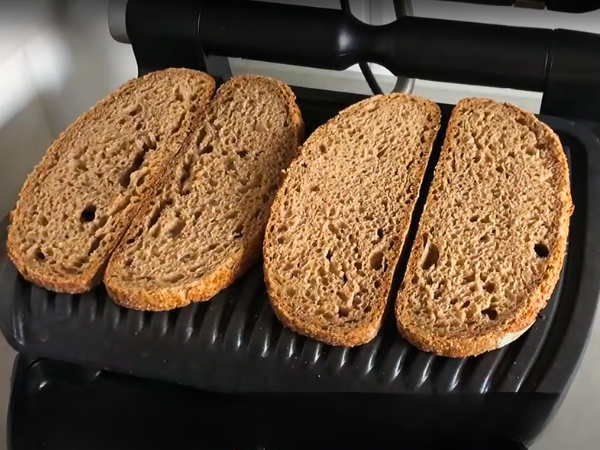
- Prepare the bread: Toast the whole grain bread slices to add a bit of crunch.
- Mash the avocado: In a small bowl, mash the avocado half with a fork. Add a pinch of salt and pepper to enhance the flavor.
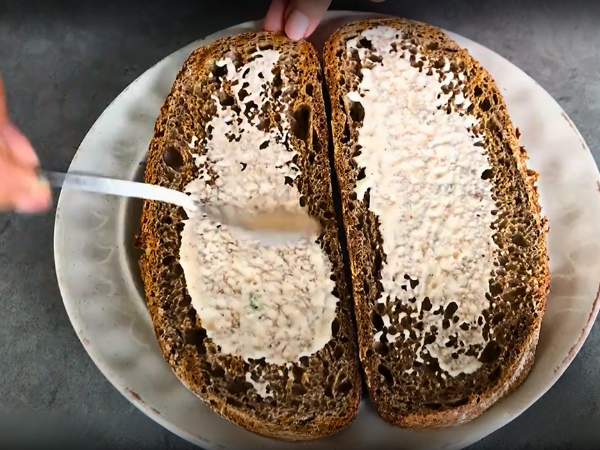
- Spread the mayo: Take one slice of toasted bread and spread the mayonnaise evenly over it.
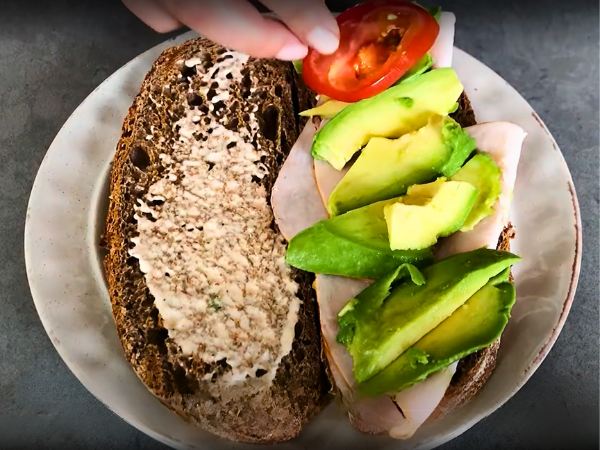
- Layer the ingredients: Start by placing the lettuce leaves on top of the mayo. Next, add the sliced turkey breast. Spread the mashed avocado over the turkey. Finally, top it off with the tomato slices.
- Assemble the sandwich: Place the second slice of toasted bread on top to complete the sandwich.
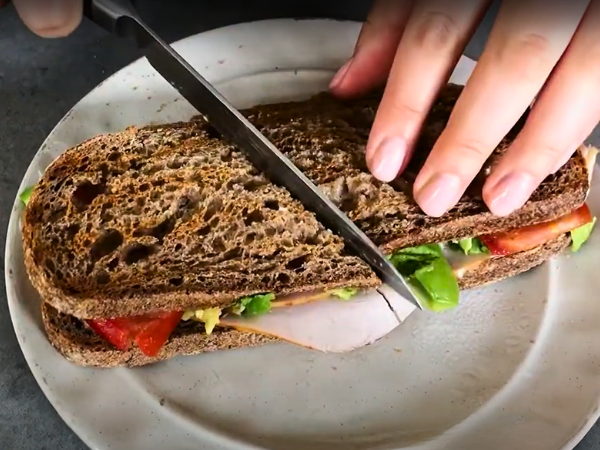
- Cut and pack: Cut the sandwich into halves or quarters, depending on your child’s preference. Place it in a sandwich container or wrap it in parchment paper for easy packing.
In under ten minutes, you have a delicious and nutritious sandwich ready for your child’s lunchbox!
How To Keep The Sandwich Fresh Until Lunchtime
Ensuring the Turkey and Avocado Sandwich stays fresh until lunchtime is crucial. Here are some tips:
- Use airtight containers: Invest in a good quality, airtight sandwich container. This will keep the sandwich from getting soggy and preserve its freshness.
- Wrap wisely: If you don’t have an airtight container, wrapping the sandwich in parchment paper or aluminum foil helps. Add a layer of plastic wrap over it for extra protection.
- Keep it cool: Pack the sandwich with a small ice pack or freeze a juice box to use as a cooling element. This will keep the ingredients fresh and prevent spoilage.
- Add moisture barriers: Place lettuce leaves on both sides of the bread to act as a barrier. This prevents the bread from absorbing too much moisture from the avocado and tomato.
By following these simple tips, you can ensure that your child’s Turkey and Avocado Sandwich remains fresh and tasty until lunchtime.
Additional Quick And Nutritious Snack Ideas
Besides the main course, adding quick and nutritious snacks will keep your child energized throughout the day. Here are some additional quick and nutritious snack ideas.
Fresh Fruit And Nut Mixes
Fresh fruit and nut mixes are a fantastic snack option. They are easy to prepare and packed with nutrients. You can mix and match different fruits and nuts to keep things interesting. Here are some ideas:
- Apple slices with almonds
- Banana chips with cashews
- Grapes with walnuts
- Dried apricots with pistachios
To make it even more fun, use a small container with sections. This way, you can add a variety of fruits and nuts without them mixing together. Here’s a simple table to show a few combination ideas:
| Fruit | Nut |
|---|---|
| Apple slices | Almonds |
| Banana chips | Cashews |
| Grapes | Walnuts |
| Dried apricots | Pistachios |
Fresh fruit and nut mixes are not only delicious but also provide essential vitamins, fiber, and healthy fats. They are a great way to keep your child full and focused.
Yogurt And Granola Parfaits
Yogurt and granola parfaits are another easy and healthy snack option. They can be prepared in minutes and are loved by kids. To make a parfait, you will need:
- Plain or flavored yogurt
- Granola
- Fresh berries or fruit
- Honey (optional)
Layer the yogurt, granola, and berries in a small jar or container. You can drizzle a little honey on top if desired. Here’s a quick recipe:
| Ingredient | Quantity |
|---|---|
| Yogurt | 1 cup |
| Granola | 1/2 cup |
| Fresh berries | 1/2 cup |
| Honey | 1 tsp (optional) |
Yogurt and granola parfaits are rich in protein, calcium, and fiber. They make a perfect snack to keep your child satisfied and energized. You can also customize the parfait by adding different fruits or nuts.
Veggie Sticks With Dip
Veggie sticks with dip are a quick and healthy snack that kids will love. They are easy to prepare and full of vitamins and minerals. Here are some popular veggie options:
- Carrot sticks
- Celery sticks
- Cucumber slices
- Bell pepper strips
For the dip, you can use hummus, ranch dressing, or yogurt-based dips. Here’s a simple table to show some dip options:
| Veggie | Dip |
|---|---|
| Carrot sticks | Hummus |
| Celery sticks | Ranch dressing |
| Cucumber slices | Yogurt dip |
| Bell pepper strips | Guacamole |
Veggie sticks with dip are a crunchy and tasty snack. They help to get more vegetables into your child’s diet. This snack is not only nutritious but also fun to eat.
Time-saving Tips For Preparing School Lunches
Time-saving tips can make this chore much easier and more enjoyable. This guide shares 3 easy school lunch ideas recipes that you can pack in minutes.
Meal Prep Strategies For The Week
One of the best ways to save time is to prepare meals in advance. Meal prep strategies can help you stay organized and reduce stress.
- Plan your menu: Write down a list of lunches for the week. This helps you know what to prepare each day.
- Batch cooking: Cook larger quantities of food on the weekend. Store them in the fridge or freezer for easy access during the week.
- Use versatile ingredients: Choose ingredients that can be used in multiple recipes. For example, grilled chicken can be used in salads, wraps, and sandwiches.
Here is a sample meal prep schedule:
| Day | Lunch Idea | Prep Steps |
|---|---|---|
| Monday | Chicken Wrap | Grill chicken, chop veggies, prepare sauce |
| Tuesday | Veggie Pasta | Boil pasta, chop veggies, make dressing |
| Wednesday | Quinoa Salad | Cook quinoa, chop veggies, mix dressing |
How To Involve Kids In Lunch Prep
Getting kids involved in lunch prep can make the process more fun and educational. Involving kids helps them learn about healthy eating and develop cooking skills.
- Choose age-appropriate tasks: Younger kids can wash fruits and veggies, while older kids can help chop and cook.
- Make it a game: Turn lunch prep into a fun activity. Use cookie cutters to make fun shapes with sandwiches and fruits.
- Create a lunch station: Set up a designated area with all the ingredients and tools needed. This makes it easier for kids to help.
Here are some tasks kids can do based on their age:
| Age Group | Tasks |
|---|---|
| 3-5 years | Wash fruits, mix ingredients, use cookie cutters |
| 6-8 years | Spread condiments, assemble sandwiches, peel veggies |
| 9-12 years | Chop vegetables, cook simple dishes, pack lunch boxes |
Storing And Reheating Tips For Hot Lunches
Storing and reheating hot lunches properly ensures they stay delicious and safe to eat. Proper storage and reheating methods help maintain the quality of the food.
- Use thermal containers: Invest in good-quality thermal containers to keep hot foods warm until lunchtime.
- Cool before storing: Let hot foods cool slightly before placing them in the fridge. This prevents condensation and keeps food fresh longer.
- Label and date: Always label and date the containers. This helps you keep track of when the food was prepared.
Reheating tips:
- Microwave-safe containers: Use containers that are safe for microwaving. Check the labels to ensure they are microwave-safe.
- Stir halfway: When reheating, stir the food halfway through to ensure even heating.
- Check temperature: Make sure the food is heated to at least 165°F (74°C) to ensure it is safe to eat.
