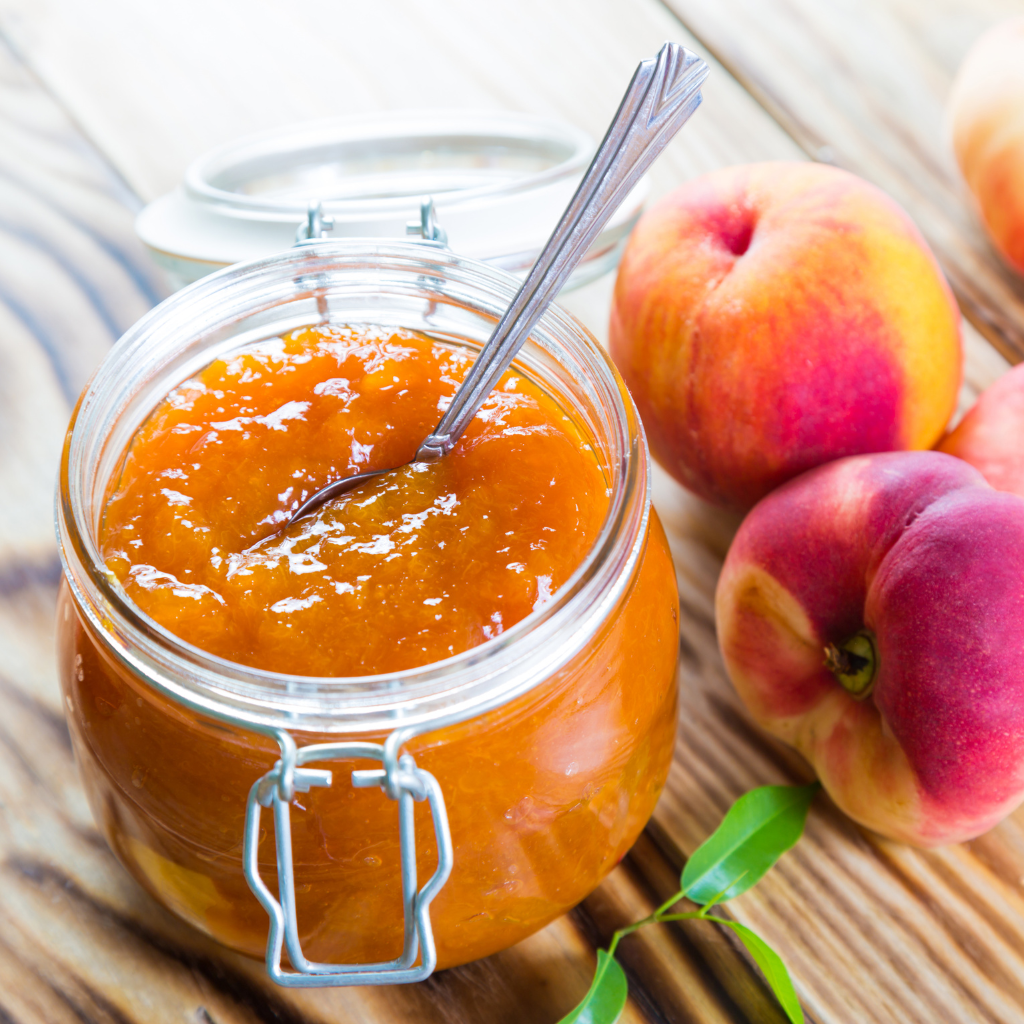
Peach Jalapeño Jam offers a delightful blend of sweet and spicy flavors. Fresh peaches bring natural sweetness, while jalapeños add a zesty kick. This jam is perfect for spreading on toast, pairing with cheese, or enhancing grilled meats.
The cooking process is simple and requires minimal equipment. This unique jam is a great way to elevate your breakfast or snacks.
Table of Contents
Ingredients Peach Jalapeño Jam
Our Peach Jalapeño Jam Recipe offers the perfect balance. This jam is a delightful way to preserve the summer flavors of juicy peaches with a kick of jalapeño heat. Before you start cooking, gather all the essential ingredients to ensure your jam turns out perfectly.
For The Jam
To create a delicious Peach Jalapeño Jam, you’ll need the following ingredients. Each component plays a crucial role in achieving the perfect taste and texture:
| Ingredient | Quantity |
|---|---|
| Fresh Peaches | 4 cups, peeled and chopped |
| Jalapeños | 2, finely chopped |
| Granulated Sugar | 3 cups |
| Lemon Juice | 2 tablespoons, freshly squeezed |
| Pectin | 1 package (1.75 oz) |
Ensure your peaches are ripe and juicy for the best results. Use gloves while handling jalapeños to avoid irritation.
Optional Add-ins (e.g., Spices, Citrus Zest)
To elevate your Peach Jalapeño Jam, consider adding these optional ingredients.
Experimenting with these add-ins can make your jam truly unique. Here’s a quick guide to incorporating them:
| Optional Add-in | Quantity |
|---|---|
| Ground Cinnamon | 1/2 teaspoon |
| Fresh Ginger | 1 teaspoon, grated |
| Vanilla Extract | 1 teaspoon |
| Lemon Zest | 1 teaspoon, grated |
| Red Pepper Flakes | 1/4 teaspoon |
Remember, a little goes a long way with these add-ins. Start with small quantities and adjust to taste. Enjoy crafting your unique version of Peach Jalapeño Jam!
Step 1: Prepare The Peaches
The first step to creating this delicious jam is to prepare the peaches. This step ensures that your jam has the perfect texture and flavor. Let’s dive into the details of preparing the peaches.
Peeling And Pitting The Peaches
To achieve a smooth and luscious jam, peeling and pitting the peaches is essential. Follow these steps for perfect peaches:
- Blanch the peaches: Bring a large pot of water to a boil. Gently place the peaches in the boiling water for 30-60 seconds.
- Transfer to ice water: Immediately move the peaches to a bowl of ice water. This stops the cooking process and makes peeling easier.
- Peel the skin: Use your fingers or a paring knife to peel off the skin. It should come off easily if the peaches are ripe.
- Cut and pit: Slice the peaches in half and remove the pit. Discard the pits or save them for another use.
Blanching peaches helps to remove the skins effortlessly. This step is crucial for a smooth jam texture. The table below summarizes the blanching process:
| Step | Time |
|---|---|
| Boil peaches | 30-60 seconds |
| Ice water bath | 1-2 minutes |

Dicing Or Mashing The Peaches
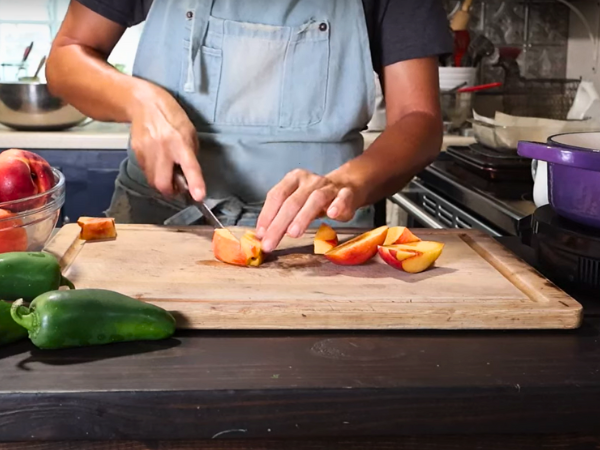
After peeling and pitting, the next step is to dice or mash the peaches. This process determines the texture of your jam. Follow these methods:
- Dicing: Cut the peeled peaches into small, uniform cubes. This method is best if you prefer a chunkier jam.
- Mashing: Use a potato masher or fork to mash the peaches. This method is ideal for a smoother jam consistency.
Consider the following tips while dicing or mashing:
- Consistency: Decide on the consistency you prefer. Chunky or smooth, it’s up to you.
- Even pieces: When dicing, make sure the pieces are uniform. This ensures even cooking.
- Texture: Mashing results in a more uniform texture, while dicing adds fruit chunks to your jam.
Here’s a quick comparison:
| Method | Texture |
|---|---|
| Dicing | Chunky |
| Mashing | Smooth |
Choose the method that fits your taste. Both methods will give you a tasty Peach Jalapeño Jam.
Step 2: Prepare The Jalapeños
Step 2 in making Peach Jalapeño Jam involves preparing the jalapeños. This step ensures your jam has the perfect balance of heat and sweetness. Let’s dive into how to handle these fiery little peppers for our delectable jam.
Removing Seeds And Stems
First, you need to remove the seeds and stems from the jalapeños. This step is crucial because the seeds and white membrane contain most of the heat. Follow these easy steps:
- Wash the Jalapeños: Rinse the peppers under cold water to remove any dirt or residue.
- Cut Off the Stems: Use a sharp knife to slice off the stem ends.
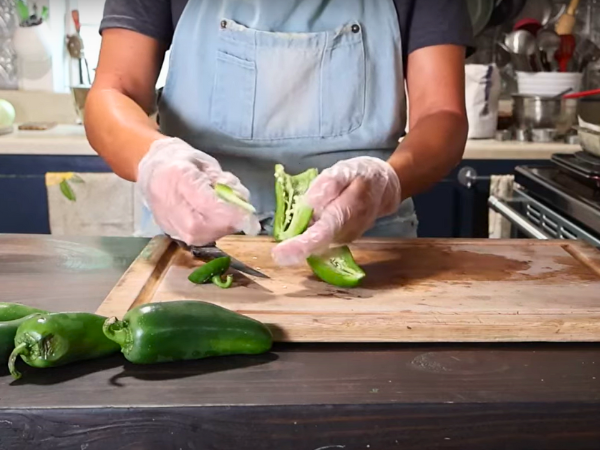
- Slice the Peppers Lengthwise: Cut each pepper in half from top to bottom.
- Remove the Seeds: Use a spoon or knife to scrape out the seeds and white membrane.
For those who prefer a milder jam, be sure to remove all seeds and membranes. If you enjoy more heat, feel free to leave a few seeds in. Here’s a quick reference table:
| Heat Level | Seeds Left |
|---|---|
| Mild | Remove All Seeds |
| Medium | Leave A Few Seeds |
| Hot | Leave Most Seeds |
Finely Chopping Or Mincing The Jalapeños
Once the seeds and stems are removed, it’s time to finely chop or mince the jalapeños. This step is vital for even distribution of heat in your jam. Follow these tips:
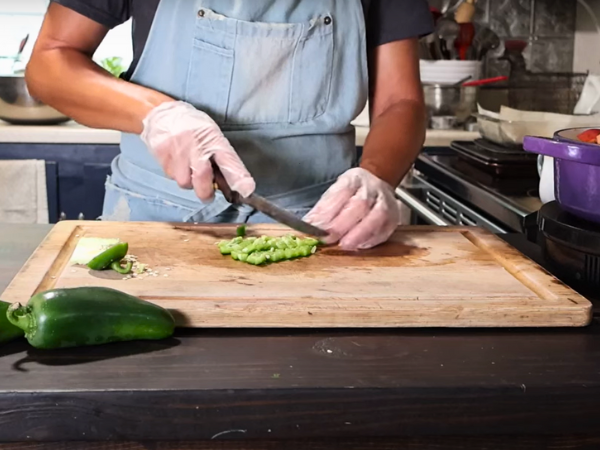
- Use a Sharp Knife: A sharp knife makes chopping easier and safer.
- Dice the Peppers: Cut each jalapeño half into thin strips.
- Chop the Strips: Turn the strips and chop them into small pieces.
- Check for Uniformity: Ensure all pieces are roughly the same size.
For those who prefer a finer texture, you can use a food processor. Just pulse the jalapeños a few times until they are minced. Here’s a quick tip: wear gloves to protect your hands from the jalapeño oils. This prevents any accidental burning if you touch your face.
Finely chopped jalapeños mix better with the peaches, providing consistent heat in every bite. Whether you chop by hand or use a food processor, this step is key to achieving the perfect Peach Jalapeño Jam.
Step 3: Combine Ingredients In A Pot
Step 3, where you combine all the ingredients in a pot, is crucial for the perfect jam. This step ensures that the peaches and jalapeños mix well with the sugar, creating a delightful balance of tastes.
Adding Peaches, Jalapeños, And Sugar
Start by preparing your peaches. Peel, pit, and chop them into small pieces. You will need about 4 cups of chopped peaches.
- Peaches: 4 cups, chopped
- Jalapeños: 1/2 cup, finely chopped
- Sugar: 5 cups
Next, finely chop the jalapeños. Remove seeds if you prefer a milder jam. Measure about 1/2 cup of chopped jalapeños.
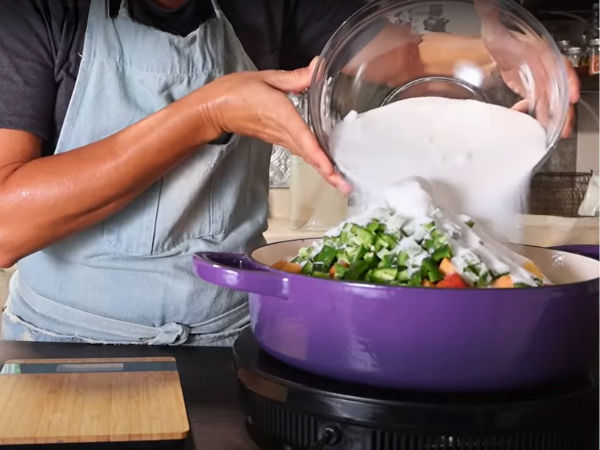
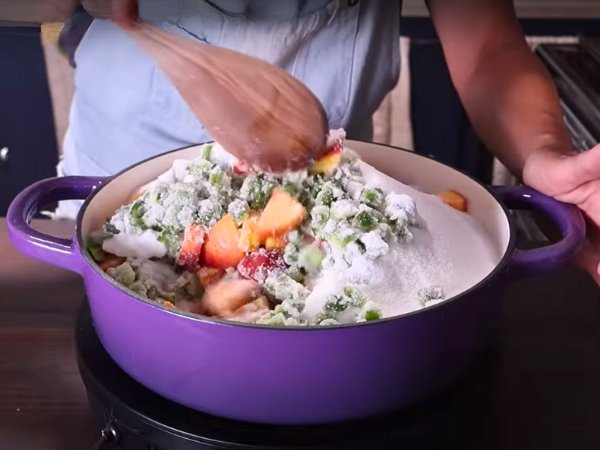
In a large pot, combine the chopped peaches, jalapeños, and sugar. The sugar helps to draw out the juices from the peaches, creating a syrupy base for your jam.
| Ingredient | Quantity |
|---|---|
| Chopped Peaches | 4 cups |
| Chopped Jalapeños | 1/2 cup |
| Sugar | 5 cups |
Mix everything well in the pot. Ensure that the sugar coats all the fruit pieces. This step is important for the jam to thicken properly.
Stirring To Dissolve Sugar
Place the pot on the stove over medium heat. Stir constantly to help dissolve the sugar. This prevents the sugar from burning and ensures an even mix.
As the mixture heats up, the sugar will start to dissolve. Keep an eye on the pot and stir frequently. You will notice the mixture becoming more liquid as the peaches release their juices.
It is important to stir continuously. This ensures that the sugar does not stick to the bottom of the pot and burn. Use a wooden spoon for this task, as it is gentle on the pot and effective for stirring.
- Heat on medium: This allows the sugar to dissolve slowly.
- Stir constantly: Ensures even mixing and prevents burning.
- Watch for bubbles: This indicates that the sugar is dissolving.
Once the sugar has fully dissolved, increase the heat slightly to bring the mixture to a boil. Continue to stir to prevent sticking. The jam will start to thicken as it cooks.
Cooking time varies, but typically takes about 20-30 minutes. You will know the jam is ready when it reaches a thicker, syrupy consistency.
Step 4: Cook The Jam
In Step 4, we’re going to cook the jam to perfection. This step is crucial for achieving the right consistency and flavor. Follow these detailed instructions to ensure your jam turns out just right.
Bringing The Mixture To A Boil
First, pour the peach and jalapeño mixture into a large pot. Ensure the pot is large enough to allow the mixture to boil without overflowing. Stir the mixture continuously to prevent it from sticking to the bottom of the pot.
Add the sugar gradually while stirring. This helps the sugar dissolve completely and evenly. Use a wooden spoon for stirring, as it’s gentle on the pot and the mixture.
- Keep the heat on medium-high.
- Stir frequently to avoid burning.
- Use a candy thermometer to monitor the temperature.
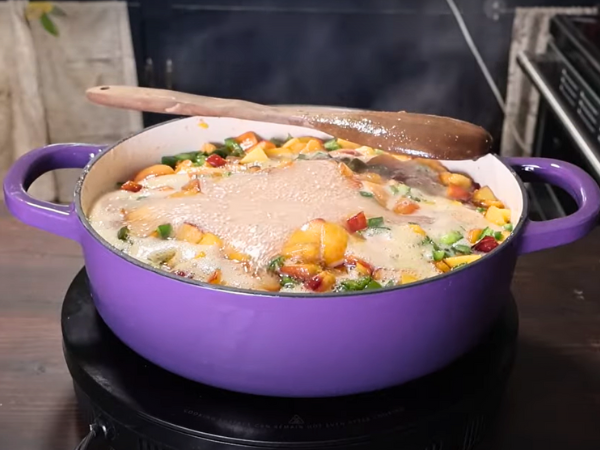
Once the mixture starts to boil, you’ll notice it thickening. Boil the mixture for about 5-10 minutes. Make sure it reaches a rolling boil, where bubbles form consistently across the surface.
Here’s a quick reference table for boiling stages:
| Stage | Temperature (°F) | Indicators |
|---|---|---|
| Initial Boil | 212°F | Slow bubbling |
| Rolling Boil | 220°F | Consistent bubbling |
Simmering And Reducing The Jam
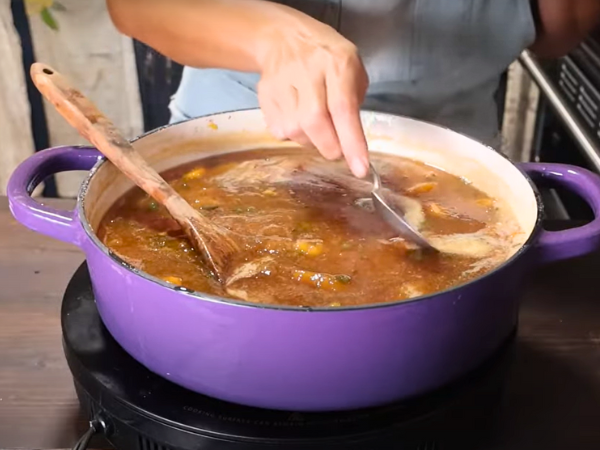
After reaching a rolling boil, reduce the heat to medium-low. Allow the mixture to simmer. This step is essential for reducing the jam to the right thickness.
Simmer the jam for about 30-40 minutes. Stir occasionally to prevent it from sticking. As it simmers, the water content evaporates, and the flavors concentrate.
Here are some tips for effective simmering:
- Use a heavy-bottomed pot to ensure even heat distribution.
- Stir every 5-10 minutes.
- Skim off any foam that forms on the surface.
Check the consistency regularly. The jam should start to thicken and become glossy. The longer it simmers, the thicker it gets.
Keep an eye on the color as well. The jam will turn a deep amber hue as it reduces. This rich color indicates that the sugars are caramelizing, adding depth to the flavor.
Testing For Desired Consistency
To test the jam’s consistency, use the cold plate method. Place a small plate in the freezer when you start cooking the jam. Once you think the jam is ready, drop a spoonful onto the cold plate.
Let it sit for a minute. Push the jam with your finger. If it wrinkles and holds its shape, it’s done. If it runs, it needs more time.
Here’s a simple checklist for testing consistency:
- Place a plate in the freezer at the start.
- Drop a spoonful of jam on the cold plate.
- Wait 1 minute.
- Push the jam with your finger.
- Look for wrinkles.
Repeat the test every 5 minutes until you achieve the desired consistency. This ensures you don’t overcook the jam.
Remember: Jam thickens as it cools. So, it’s better to stop a little before it reaches the perfect thickness. Once you’re happy with the consistency, remove the pot from heat. Let it cool slightly before transferring to jars.
Step 5: Prepare The Jars
Step 5: Prepare the Jars is vital for preserving the jam’s flavor and extending its shelf life. Let’s dive into this essential step.
Sterilizing Jars And Lids
Sterilizing jars and lids is essential to keep the jam fresh and safe. Germs can spoil your jam if jars aren’t clean. Follow these simple steps to sterilize jars and lids:
- Wash jars and lids with hot, soapy water. Rinse thoroughly.
- Place jars in a large pot. Fill with water until jars are fully submerged.
- Bring water to a boil and let jars boil for 10 minutes. This kills any bacteria.
- Remove jars carefully using tongs. Place them upside down on a clean towel to dry.
- For lids, place them in a small pot. Cover with water and bring to a simmer for 5 minutes. Do not boil.
- Remove lids with tongs and let them dry on a clean towel.
Make sure not to touch the inside of jars or lids after sterilizing. This keeps them clean. Use a jar lifter or tongs to handle them. Now, your jars are ready for the jam.
Preparing For Canning Or Storing
Once jars and lids are sterilized, it’s time to fill them with your Peach Jalapeño Jam. Follow these steps to ensure proper canning or storing:
- Place a funnel in the jar. This makes filling easier and cleaner.
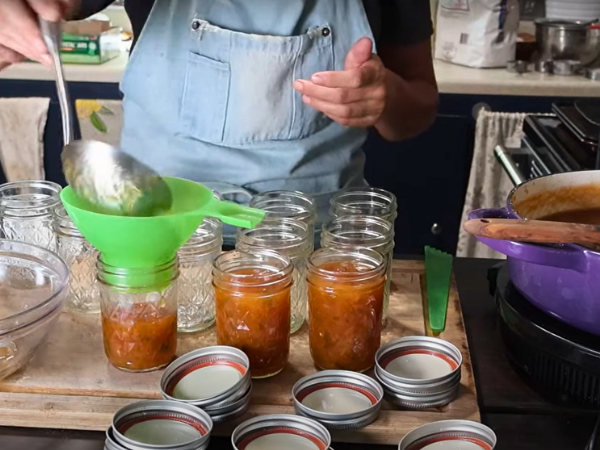
- Ladle the hot jam into jars. Leave about 1/4 inch space at the top. This is called headspace.
- Wipe the jar rims with a clean, damp cloth. This ensures a good seal.
- Place lids on jars. Screw on the bands until they are fingertip tight. Do not over-tighten.
- For long-term storage, process jars in a boiling water bath for 10 minutes.
- Remove jars and let them cool. You will hear a popping sound. This means jars are sealed.
- Check seals by pressing the center of each lid. If it doesn’t pop back, the jar is sealed.
If a jar does not seal, refrigerate it and use it within a few weeks. Properly sealed jars can be stored in a cool, dark place for up to a year.
Enjoy your Peach Jalapeño Jam anytime! It’s perfect on toast, with cheese, or as a glaze for meats.
Step 6: Fill And Seal The Jars
One crucial step is filling and sealing the jars to keep the jam fresh and tasty. Let’s dive into the details of how to properly fill and seal your jars for the best results.
Ladling Jam Into The Jars
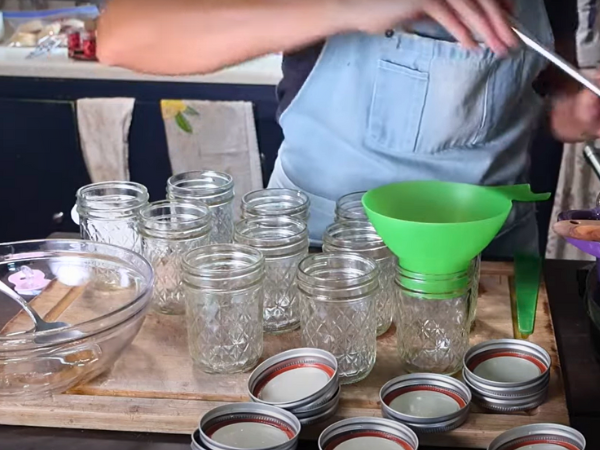
Once your Peach Jalapeño Jam has reached the perfect consistency, it’s time to fill the jars. Sterilized jars are essential to ensure the jam remains fresh and safe. Use a jar funnel to make the process cleaner and more efficient.
Follow these steps to ladle the jam into the jars:
- Place the sterilized jars on a clean towel.
- Using the jar funnel, carefully ladle the hot jam into the jars.
- Leave about 1/4 inch of headspace at the top of each jar.
- Wipe the rims of the jars with a damp cloth to remove any residue.
Leaving the right amount of headspace is crucial. It allows the jam to expand slightly during the sealing process. Ensure the jars are filled evenly to maintain consistency.
Sealing And Processing The Jars (if Canning)
Sealing the jars properly ensures your Peach Jalapeño Jam stays fresh for months. If you are canning, this step is even more critical. Start by placing the lids and bands on the jars.
Follow these steps for a perfect seal:
- Place the lids on the jars, ensuring they are centered.
- Screw the bands on until they are finger-tight.
- Place the jars in a water bath canner.
- Ensure the water covers the jars by at least 1 inch.
- Boil the jars for 10 minutes to process them.
After processing, remove the jars with a jar lifter and place them on a towel. Let them cool for 12-24 hours. Check the seals by pressing the center of each lid. If it doesn’t pop back, the jar is sealed.
Properly sealed jars can be stored for up to a year. Label each jar with the date and contents to keep track of your delicious Peach Jalapeño Jam.
Step 7: Cool And Store The Jam
Step 7: Cool and Store the Jam is crucial to ensure the jam sets properly and stays fresh. Let’s dive into the final step of making this delicious jam.
Cooling The Jars Completely
After sealing the jars, the next step is to let them cool completely. This is essential for the jam to set properly. Follow these steps:
- Place the jars on a cooling rack.
- Ensure jars are spaced apart, allowing air to circulate around each jar.
- Let them sit undisturbed for 12-24 hours.
Do not move or tilt the jars during this cooling period. This helps the jam to firm up and ensures a proper seal. You might hear a “pop” sound as the jars seal. This is a good sign!
After the cooling period, check the seals. Press down on the center of each lid:
| Seal Check | What to Do |
|---|---|
| Lid doesn’t move | Seal is good |
| Lid pops up and down | Refrigerate and use within 3 weeks |
Storing In The Pantry Or Refrigerator
Once the jars are completely cooled and sealed, it’s time to store them. You can choose to store them in the pantry or refrigerator:
- Pantry: Store in a cool, dark place. Sealed jars can last up to a year.
- Refrigerator: Ideal for opened jars or jars with failed seals. They last up to 3 weeks.
Label each jar with the date of preparation. This helps in keeping track of their freshness. Always check the jam before use:
- Look for any signs of spoilage like mold.
- Smell the jam. It should smell sweet and fruity.
- If it looks or smells off, discard it.
Proper storage ensures your Peach Jalapeño Jam stays fresh and delicious. Enjoy it on toast, with cheese, or as a glaze for meats. Happy jamming!
