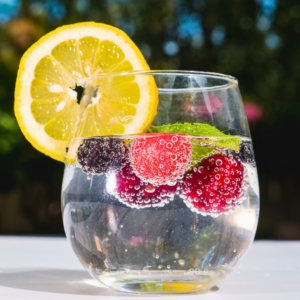
Pear preserves are a delightful way to capture the essence of ripe pears. This homemade jam is perfect for spreading on toast, topping desserts, or adding a sweet touch to savory dishes.
The process is straightforward and rewarding, offering a taste of homemade goodness that store-bought versions can’t match. Fresh, ripe pears are the star of this recipe, ensuring a rich, natural flavor.
Table of Contents
Ingredients Needed For Pear Preserves
The key to perfect homemade jam lies in the quality and combination of ingredients. Below, you will find a detailed guide on the essential ingredients needed for making delicious pear preserves.
Selecting The Best Pears
Choosing the right pears is crucial for your preserves. Not all pears are created equal. Here are some tips to ensure you pick the best:
| Type of Pear | Quantity | Characteristics |
|---|---|---|
| Bartlett Pears | 6-8 medium-sized pears | Sweet and juicy, ideal for making smooth and sweet preserves. |
| Anjou Pears | 6-8 medium-sized pears | Firm and slightly tart, adds a nice balance of flavors with a bit of zing. |
| Bosc Pears | 6-8 medium-sized pears | Firm texture, holds shape well during cooking, perfect for chunkier preserves. |
When selecting pears, ensure they are:
- Ripe: They should be slightly soft to the touch but not mushy.
- Unblemished: Avoid pears with spots or bruises.
- Sweet-smelling: A fragrant pear indicates ripeness and sweetness.
In total, you’ll need about 12-16 pears (a mix of varieties if desired) for this recipe.
Other Essential Ingredients
Beyond pears, several other ingredients play a vital role in making perfect pear preserves. Here’s a list of what you need:
| Ingredient | Quantity | Purpose |
|---|---|---|
| Sugar | 4-5 cups | Main sweetener and preservative |
| Lemon Juice | 2 tablespoons | Adds acidity to balance sweetness and preserve color |
| Pectin | 1 package (approximately 1.75 oz) | Natural thickening agent for desired consistency |
| Cinnamon | 1 teaspoon | (Optional) Adds warm, spiced flavor |
| Cloves | 1/2 teaspoon | (Optional) Enhances flavor with a hint of spice |
| Nutmeg | 1/4 teaspoon | (Optional) Provides a subtle nutty warmth |
You might be interested in: Peach Jalapeño Jam
Step-by-step Instructions For Making Pear Preserves
Follow our step-by-step instructions to create the perfect homemade jam.
Preparing The Pears
Start by selecting the freshest pears. Ensure they are ripe but firm. You will need about 12-16 medium-sized pears (a mix of Bartlett, Anjou, and Bosc pears) for this recipe.
- Wash the pears thoroughly to remove any dirt or pesticides.
- Peel the pears using a vegetable peeler.
- Core the pears to remove the seeds and the tough center.
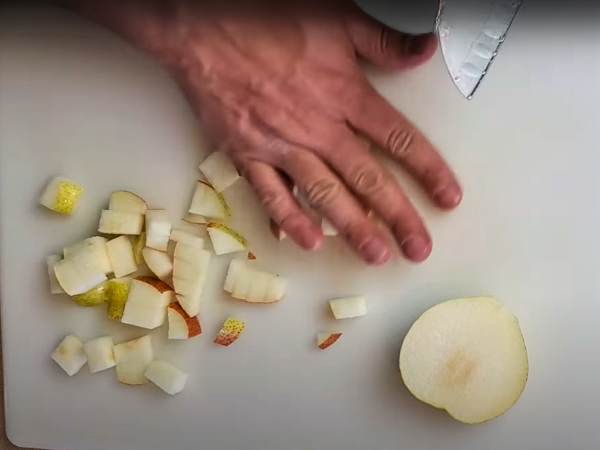
- Slice the pears into thin, even pieces for uniform cooking.
- To prevent the pears from browning, place them in a bowl of water with 2 tablespoons of lemon juice.
To prevent the pears from browning, place them in a bowl of water with a few tablespoons of lemon juice.
| Ingredient | Amount |
|---|---|
| Pears | 12-16 medium-sized pears |
| Sugar | 4-5 cups |
| Lemon Juice | 2 tablespoons |

Cooking The Pear Preserves
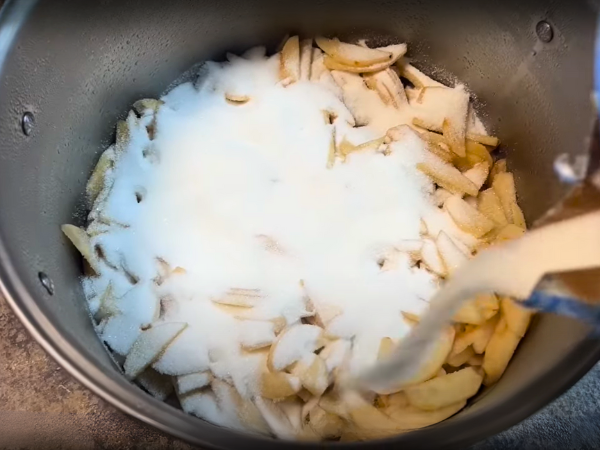
- Place the prepared pears in a large pot. Add 4-5 cups of sugar and 2 tablespoons of lemon juice. Stir to combine.
- Bring the mixture to a boil over medium heat, stirring occasionally.
- Reduce the heat and simmer, allowing the pears to cook slowly.
- Stir frequently to prevent sticking and burning.
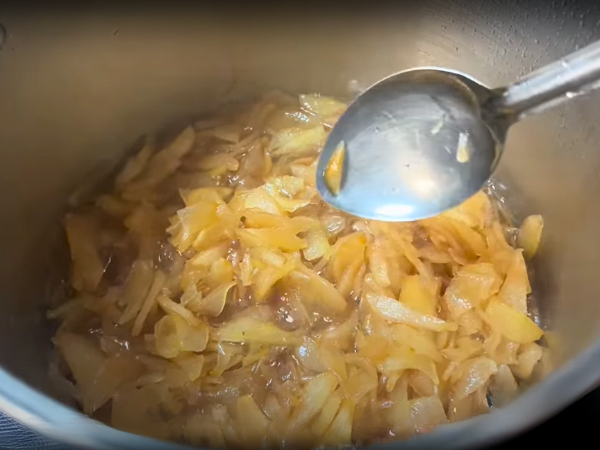
- Cook for about 1-2 hours until the pears are translucent and the syrup thickens.
During cooking, you can add:
- Spices (Optional): For added flavor, consider adding 1 teaspoon of cinnamon, 1/2 teaspoon of cloves, and 1/4 teaspoon of nutmeg to the mixture.
6. Test the consistency by placing a small amount of preserves on a cold plate. If it thickens as it cools, the preserves are ready.
7. Remove from heat and let cool slightly before transferring to sterilized jars.

Testing For The Perfect Consistency
Testing the consistency is crucial for perfect pear preserves. Here’s how to do it:
- Place a small plate in the freezer while the preserves cook.
- Spoon a bit of the hot preserve onto the cold plate.
- Allow it to cool for a minute.
- Run your finger through the preserve. If it wrinkles and holds its shape, it’s ready.
If the preserve is too runny, cook it a bit longer and test again. This ensures your pear preserves have the perfect texture for spreading.
Canning Techniques Pear Preserves
This guide will walk you through the essential steps of sterilizing jars, filling jars, and the sealing process to ensure your pear preserves are safe and delicious.
Sterilizing Jars
Sterilizing jars is crucial for preserving your pear jam safely. Clean jars prevent bacteria from spoiling your preserves. Follow these steps to ensure your jars are sterile:
- Wash the jars: Use hot, soapy water to wash your jars thoroughly. Rinse them well to remove any soap residue.
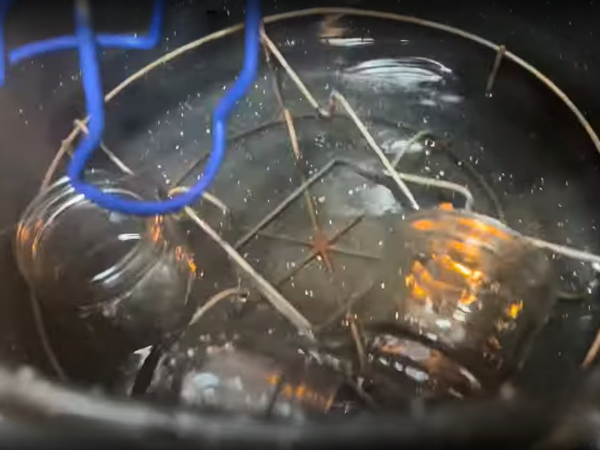
- Boil the jars: Place the jars in a large pot and cover them with water. Bring the water to a boil and let the jars boil for at least 10 minutes. This kills any remaining bacteria.
- Dry the jars: Remove the jars from the boiling water using tongs. Place them on a clean towel to air dry. Ensure they remain upside down to prevent dust from entering.
Remember to also sterilize the lids and rings by boiling them for 5 minutes. This ensures that every part of the jar is bacteria-free.
Filling Jars
Filling the jars correctly is essential for preserving the flavor and quality of your pear jam. Here are the steps to follow:
- Prepare the jam: Cook your pear jam according to your recipe. Make sure it reaches the desired consistency before filling the jars.
- Fill the jars: Using a ladle or funnel, carefully pour the hot jam into the sterilized jars. Leave about 1/4 inch of headspace at the top to allow for expansion.
- Remove air bubbles: Use a non-metallic utensil, like a plastic spatula, to remove any trapped air bubbles. Run it around the inside edge of the jar.
- Wipe the rims: Clean the rims of the jars with a damp cloth to ensure a good seal. Any residue can prevent the lids from sealing properly.
Sealing Process
The sealing process ensures your pear preserves stay fresh for a long time. Follow these steps to seal your jars effectively:
- Apply the lids: Place the sterilized lids on the jars. Screw on the rings until they are fingertip tight. Do not overtighten as this can prevent a proper seal.
- Process the jars: Place the filled jars back into the boiling water pot. Ensure they are covered with at least 1 inch of water. Boil the jars for 10 minutes to create a vacuum seal.
- Cool the jars: Remove the jars from the water using tongs. Place them on a towel to cool. As they cool, you will hear a “pop” sound indicating the jars are sealed.
- Check the seals: Once cooled, check the seals by pressing the center of the lids. If the lid does not pop back, the jar is sealed correctly. If it does, refrigerate and use the jam immediately.
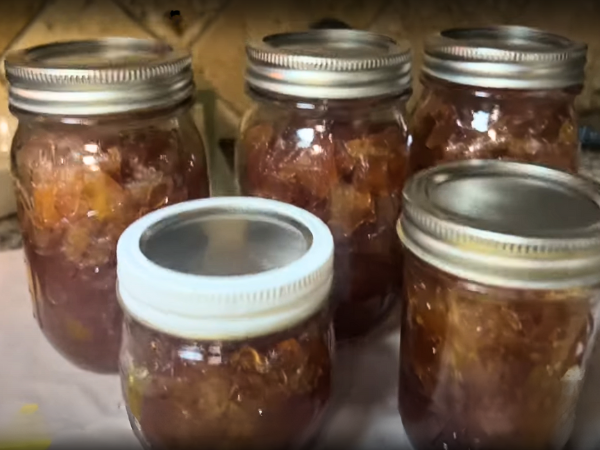
Properly sealed jars can be stored in a cool, dark place for up to a year, ensuring you enjoy your homemade pear preserves long after the pears are out of season.
Storage Tips Pear Preserves
To ensure your pear preserves stay fresh and delicious, proper storage is key. Follow these storage tips to keep your homemade jam in perfect condition.
Cool Down Period
After cooking your pear preserves, allow them to cool down properly before storing. This step is crucial to prevent condensation inside the jar, which can cause mold growth.
Follow these steps to ensure a proper cool down:
- Remove from heat: Once your preserves are ready, take them off the stove immediately.
- Fill jars: Carefully ladle the hot preserves into sterilized jars, leaving about 1/4 inch of headspace at the top.
- Seal and invert: Seal the jars tightly and invert them for 5 minutes. This helps to ensure a good seal.
- Upright position: Turn the jars upright and let them cool completely on a wire rack.
Allow at least 12 hours for the preserves to cool down completely. Avoid placing hot jars in the refrigerator to speed up the cooling process, as this can cause the glass to crack.
Best Storage Practices
Proper storage practices are essential for maintaining the quality and safety of your pear preserves. Here are some tips to follow:
- Label and date: Always label your jars with the date they were made. This helps you keep track of their age.
- Store in a cool, dark place: Keep your preserves in a pantry or cupboard away from direct sunlight and heat sources.
- Avoid temperature fluctuations: Store the jars in a stable environment to prevent spoilage.
- Use airtight containers: Ensure the jars are sealed tightly to keep out air and contaminants.
Consider using a table to organize your storage:
| Storage Method | Recommended Temperature | Notes |
|---|---|---|
| Pantry | 50-70°F | Avoid light and heat |
| Refrigerator | 32-40°F | For opened jars |
| Freezer | 0°F | Use freezer-safe jars |
Shelf Life
Understanding the shelf life of your pear preserves helps ensure you enjoy them at their best. Homemade jams have different shelf lives based on storage conditions:
- Unopened jars: When stored in a cool, dark place, unopened jars can last up to one year.
- Opened jars: Once opened, keep the jar in the refrigerator and consume within 3-4 weeks.
- Frozen preserves: Pear preserves can be frozen for up to 6 months without losing quality.
Here are some tips to maximize shelf life:
- Check seals regularly to ensure they are intact.
- Discard any jars with bulging lids or off smells.
- Avoid using metal utensils, which can introduce bacteria.
By following these storage tips, you can enjoy your delicious pear preserves for as long as possible.
Troubleshooting Common Issues
Sometimes, things don’t go as planned, and you might run into a few issues. This guide helps you troubleshoot common problems to ensure your pear preserves turn out perfect every time.
Too Runny
If your pear preserves are too runny, it can be frustrating. Here are a few reasons why this might happen and how to fix it:
- Insufficient Cooking Time: Cooking the preserves for a shorter time can prevent the liquid from thickening. Ensure you cook the pears until they reach the desired consistency.
- Lack of Pectin: Pectin helps in thickening jams and jellies. Pears are naturally low in pectin. Adding a commercial pectin can help.
- Incorrect Sugar Ratio: Sugar helps in setting the preserves. Use the correct amount as specified in the recipe.
If your preserves are runny, try these solutions:
- Re-cook the Preserves: Return the preserves to the pot and cook them on low heat until they thicken.
- Add Pectin: Stir in some powdered pectin and boil for a few minutes.
Too Thick
Having pear preserves that are too thick can also be a problem. Here are some common causes and their solutions:
- Overcooking: Cooking the preserves for too long can evaporate too much liquid, making them too thick. Monitor the cooking time carefully.
- Too Much Sugar: Excessive sugar can make the preserves dense and sticky. Follow the recipe measurements accurately.
To fix thick preserves, you can:
- Add Water or Juice: Stir in a small amount of water or pear juice to loosen the mixture. Heat gently until it reaches the desired consistency.
- Blend the Preserves: Use a hand blender to smooth out the texture if it’s too lumpy.
By identifying and addressing these common issues, you can ensure your pear preserves turn out just right.
Conclusion
Creating pear preserves at home is simple and rewarding. Follow our guide for delicious, homemade jam every time. Enjoy the fresh, sweet taste of pears in every bite. Share your homemade jam with friends and family. Preserve your pears today and savor the flavor all year round.

